Workflow Service Accounts
Overview
Workflows run autonomously and while running, sometimes need access to secure parts of the Paygate infrastructure. For example, a workflow may need to access group settings, save a file or send an email.
All of these actions require approval (authorisation) within the Paygate system and we control this access using a special sort of account called a Service Account.
All Paygate workflows must run under a Service User account. Moreover, the service user account, just like a normal user account, must be given sufficient rights in order to carry out the actions in the workflow.
Creating a Service User Account
Service User accounts are found by opening the Admin section of the Left-hand menu and clicking ‘Service Account’.
Click the ‘Create Service Account’ button.
In the select-box marked ‘Type’, choose ‘Workflow’.
Choose a username for the service account.
The Service User’s username must be globally unique across Paygate and we suggest you prefix the username with your company name, e.g. supersuds-workflow1
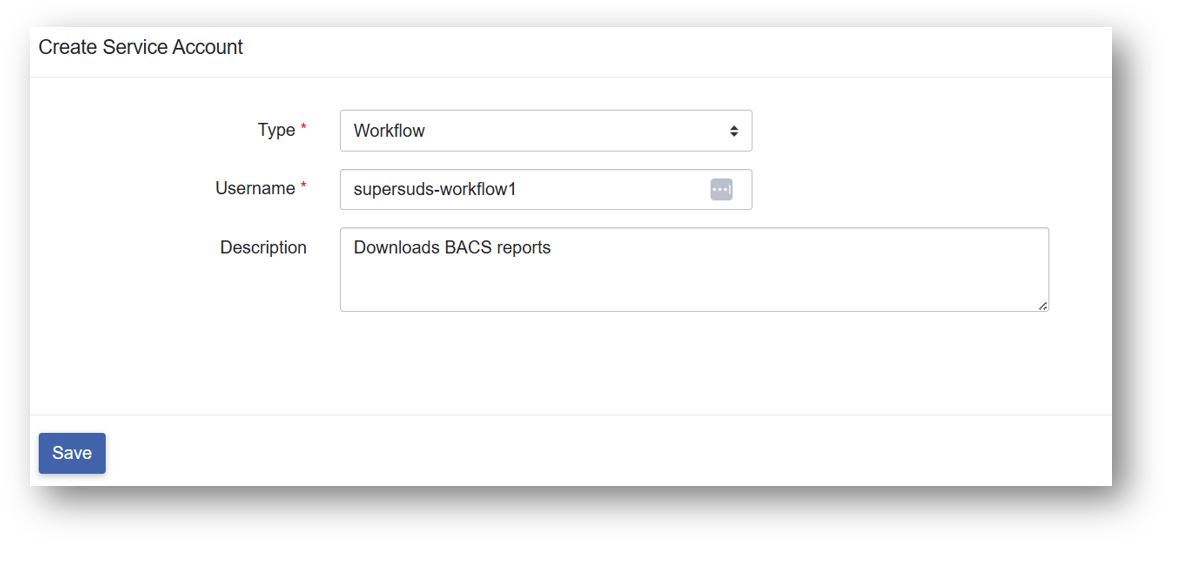
Optionally, add a brief description of the account.
Click ‘Save’ to create the account.
Assigning roles to the Service Account
The next job is to assign roles to the new service account.
Service User accounts are found by opening the Admin section of the Left-hand menu and clicking ‘Service Account’.
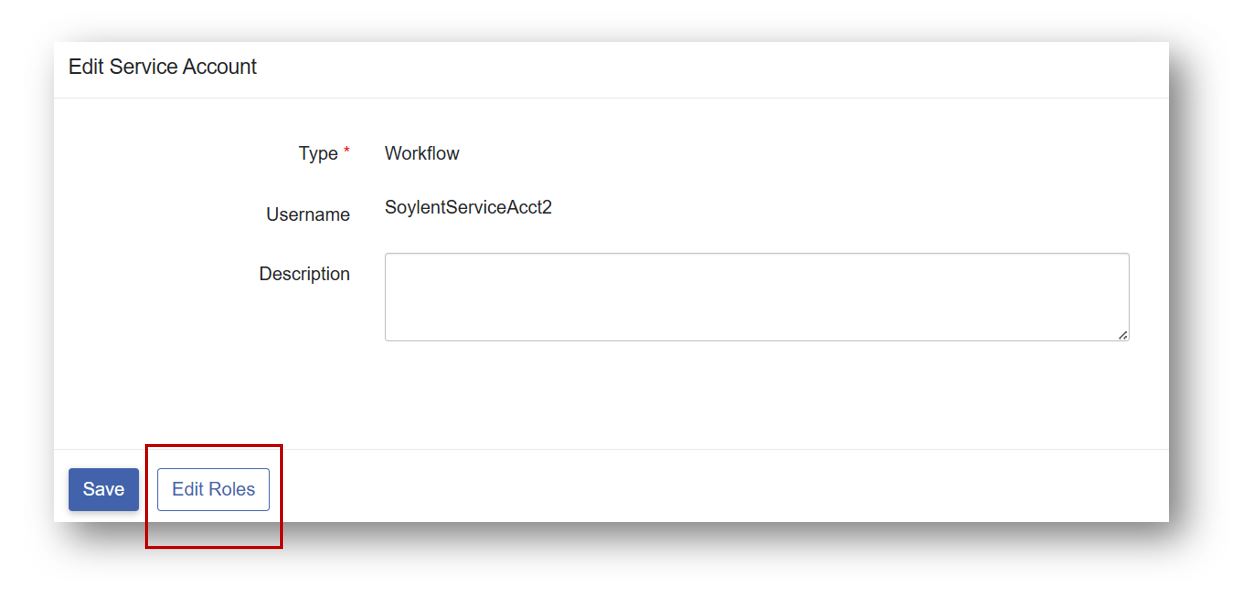
Find the Service Account in the table and click it to enter the edit page.
Click the ‘Edit Roles’ button near the bottom of the panel.
You can now assign roles to the Service Account. Click the Automation tab and add the ‘Execute Workflow’ role.
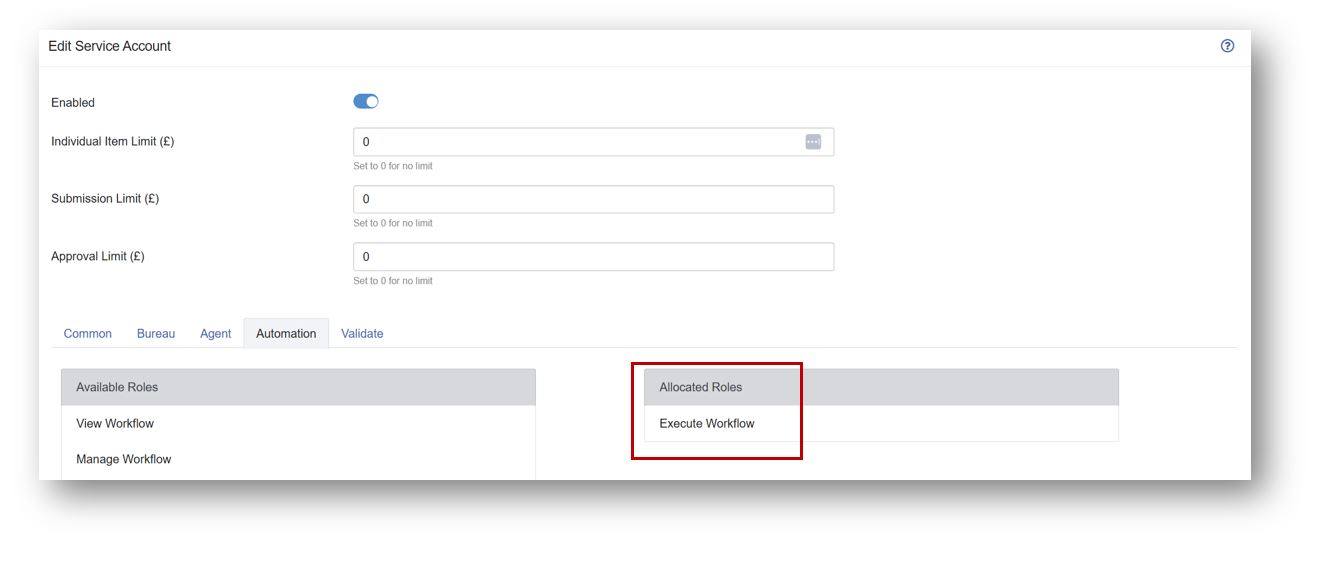
Click ‘Save’ to store the role settings.
The Service Account now has the correct role to be able to Execute a Workflow.
Assigning Group Roles
Depending on the specific actions the workflow will carry out, you may need to also assign the correct ‘Group Roles’ to the new service account.
This is usually required if the workflow is going to interact with configuration stored in group settings such as Bank Accounts, Service User Numbers or HSM certificates.
If the service account is going to be used in a workflow that downloads BACS reports then a group role is required. You need to explicitly set the service account to be allowed to download reports for the group.
From the Admin section in the left hand menu, select ‘Groups’
Choose the group that you want the service account to be a member of.
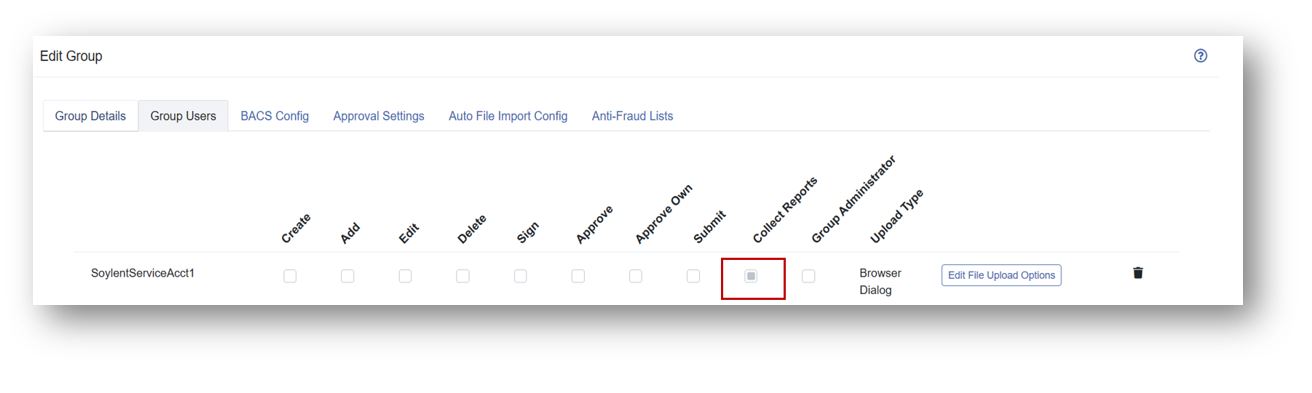
Click the ‘Group Users’ tab.
Find the Service User in the User selector and click ‘Add’.
Assign the correct group role. For downloading BACS reports, tick the ‘Collect Reports’ box next to the service user.
Using the Service Account in a workflow
Now that the Service Account has been created and has the correct roles, we can make use of the account in a workflow.
You tell Paygate which account a workflow will use by selecting the account in the ‘Start Node’.
Open or create a workflow diagram. From the left-hand menu, Automation > Workflow > Workflows and select the workflow from the table or click ‘New Workflow’ to create a new workflow.
Click the cog icon on the Start Node to enter the config panel.
Pick the Service Account from the selector.
The workflow will now use the service account when executing.